Network
To configure the network settings, please navigate to Network from the main menu in the System section.
The device provides three distinct network interfaces.
- Ethernet (cable)
- Wifi Client: The device connects to an existing Wifi network
- Wifi AP: The device provides a hotspot for other devices (computers) to connect
The Network main page presents an overview table, where each row represents one of those interfaces. A green dot on the left of a row indicates that the interface is active.
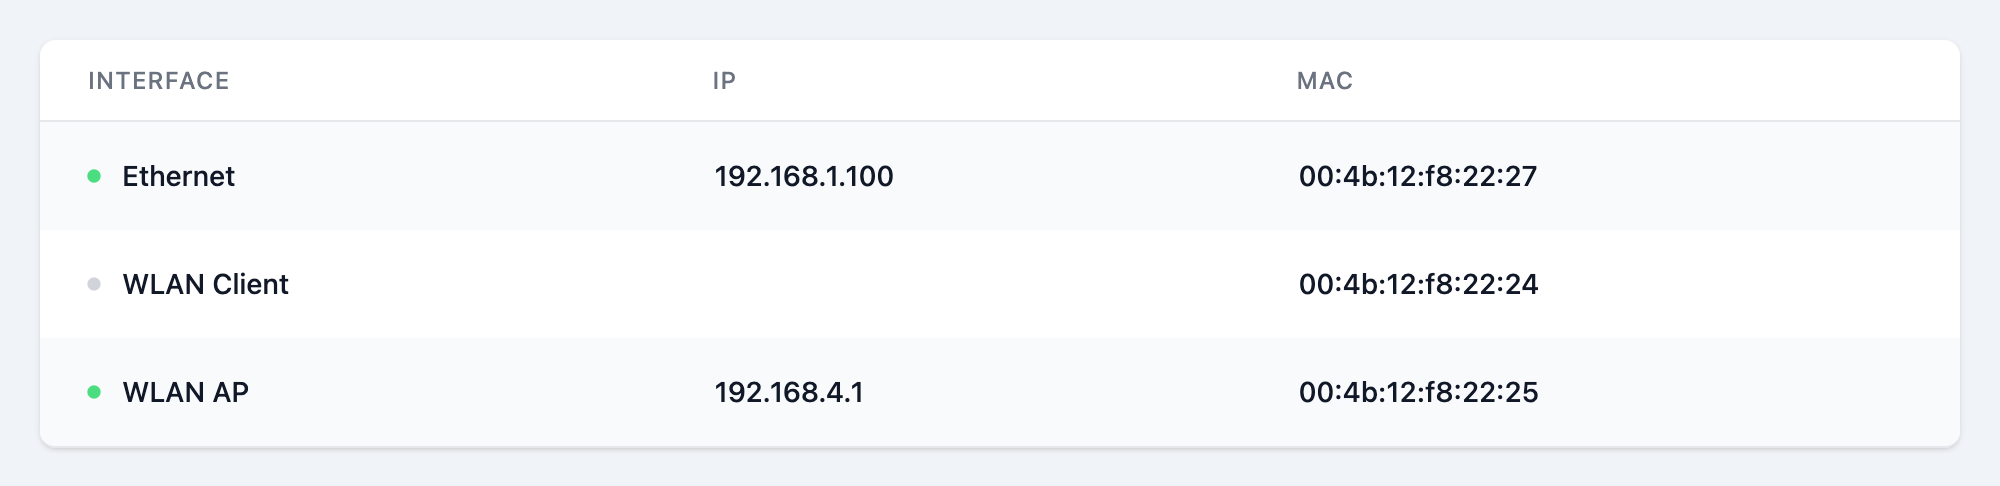
To navigate to the configuration page for a specific interface, click on the corresponding row.
Each interface is independent and all three can be active concurrently.
While the Ethernet interface is always enabled, the other two have to be enabled explicitely to become active!
In the following the configuration for each interface is explained in detail:
Ethernet
Automatic configuration
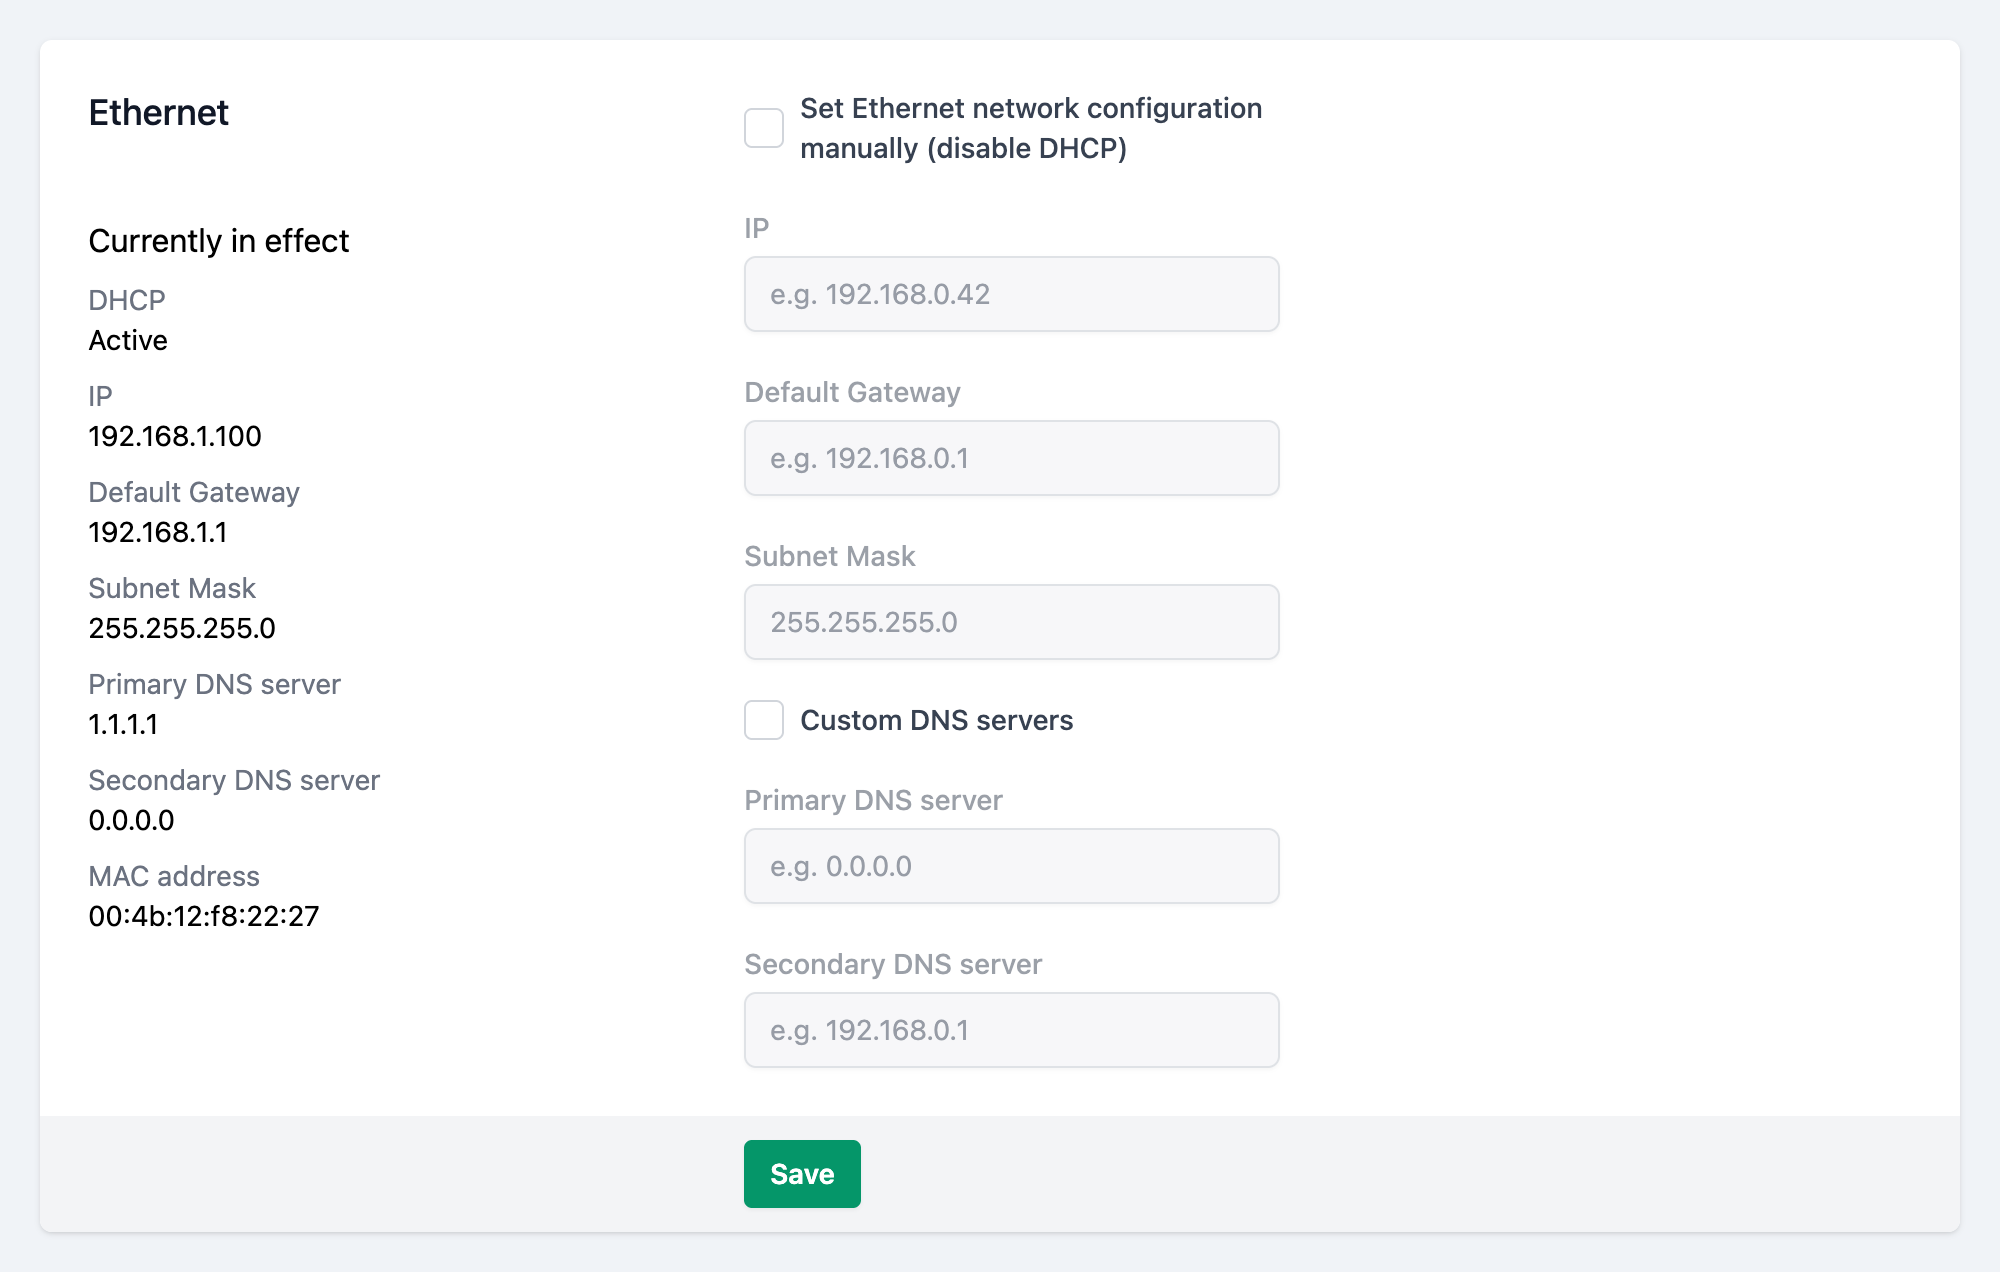
By default the Ethernet interface is set to use DHCP, to automatically configure the interface. This needs a DHCP server, which is typically part of most home and business routers.
A working DHCP configuration can be checked by verifying, that in the left column under Currently in effect, there are values present for:
- IP
- Default Gateway
- Subnet Mask
- Primary DNS Server
Additionally, the MAC address of the interface is displayed in this area.
Manual configuration
In case your setup does not provide a DHCP server, or you prefer to manually configure the interface
- Tick the checkbox
Set Ethernet network configuration manually (disable DHCP) - Fill in the form fields
- IP RequiredText
- The IP address to assign to this device
- Default Gateway RequiredText
- The IP address of the network device, that connects the network to the internet. This is typically the home or business router device
- Primary DNS server OptionalText
- (optional) The IP address of the primary DNS server to use
- Secondary DNS server OptionalText
- (optional) The IP address of the secondary DNS server to use
- IP
- Click the button
Automatic configuration with custom DNS servers
In case your setup does provide a DHCP server, but you want to set the DNS servers manually
-
Leave the checkbox
Set Ethernet network configuration manually (disable DHCP)unticked. -
Tick the checkbox
Custom DNS servers. -
Fill in the form fields
- Primary DNS server RequiredText
- The IP address of the primary DNS server to use
- Secondary DNS server OptionalText
- (optional) The IP address of the secondary DNS server to use
- Primary DNS server
-
Click the button
Wifi Client
The Wifi Client Mode renders the device a client in an existing Wifi network.
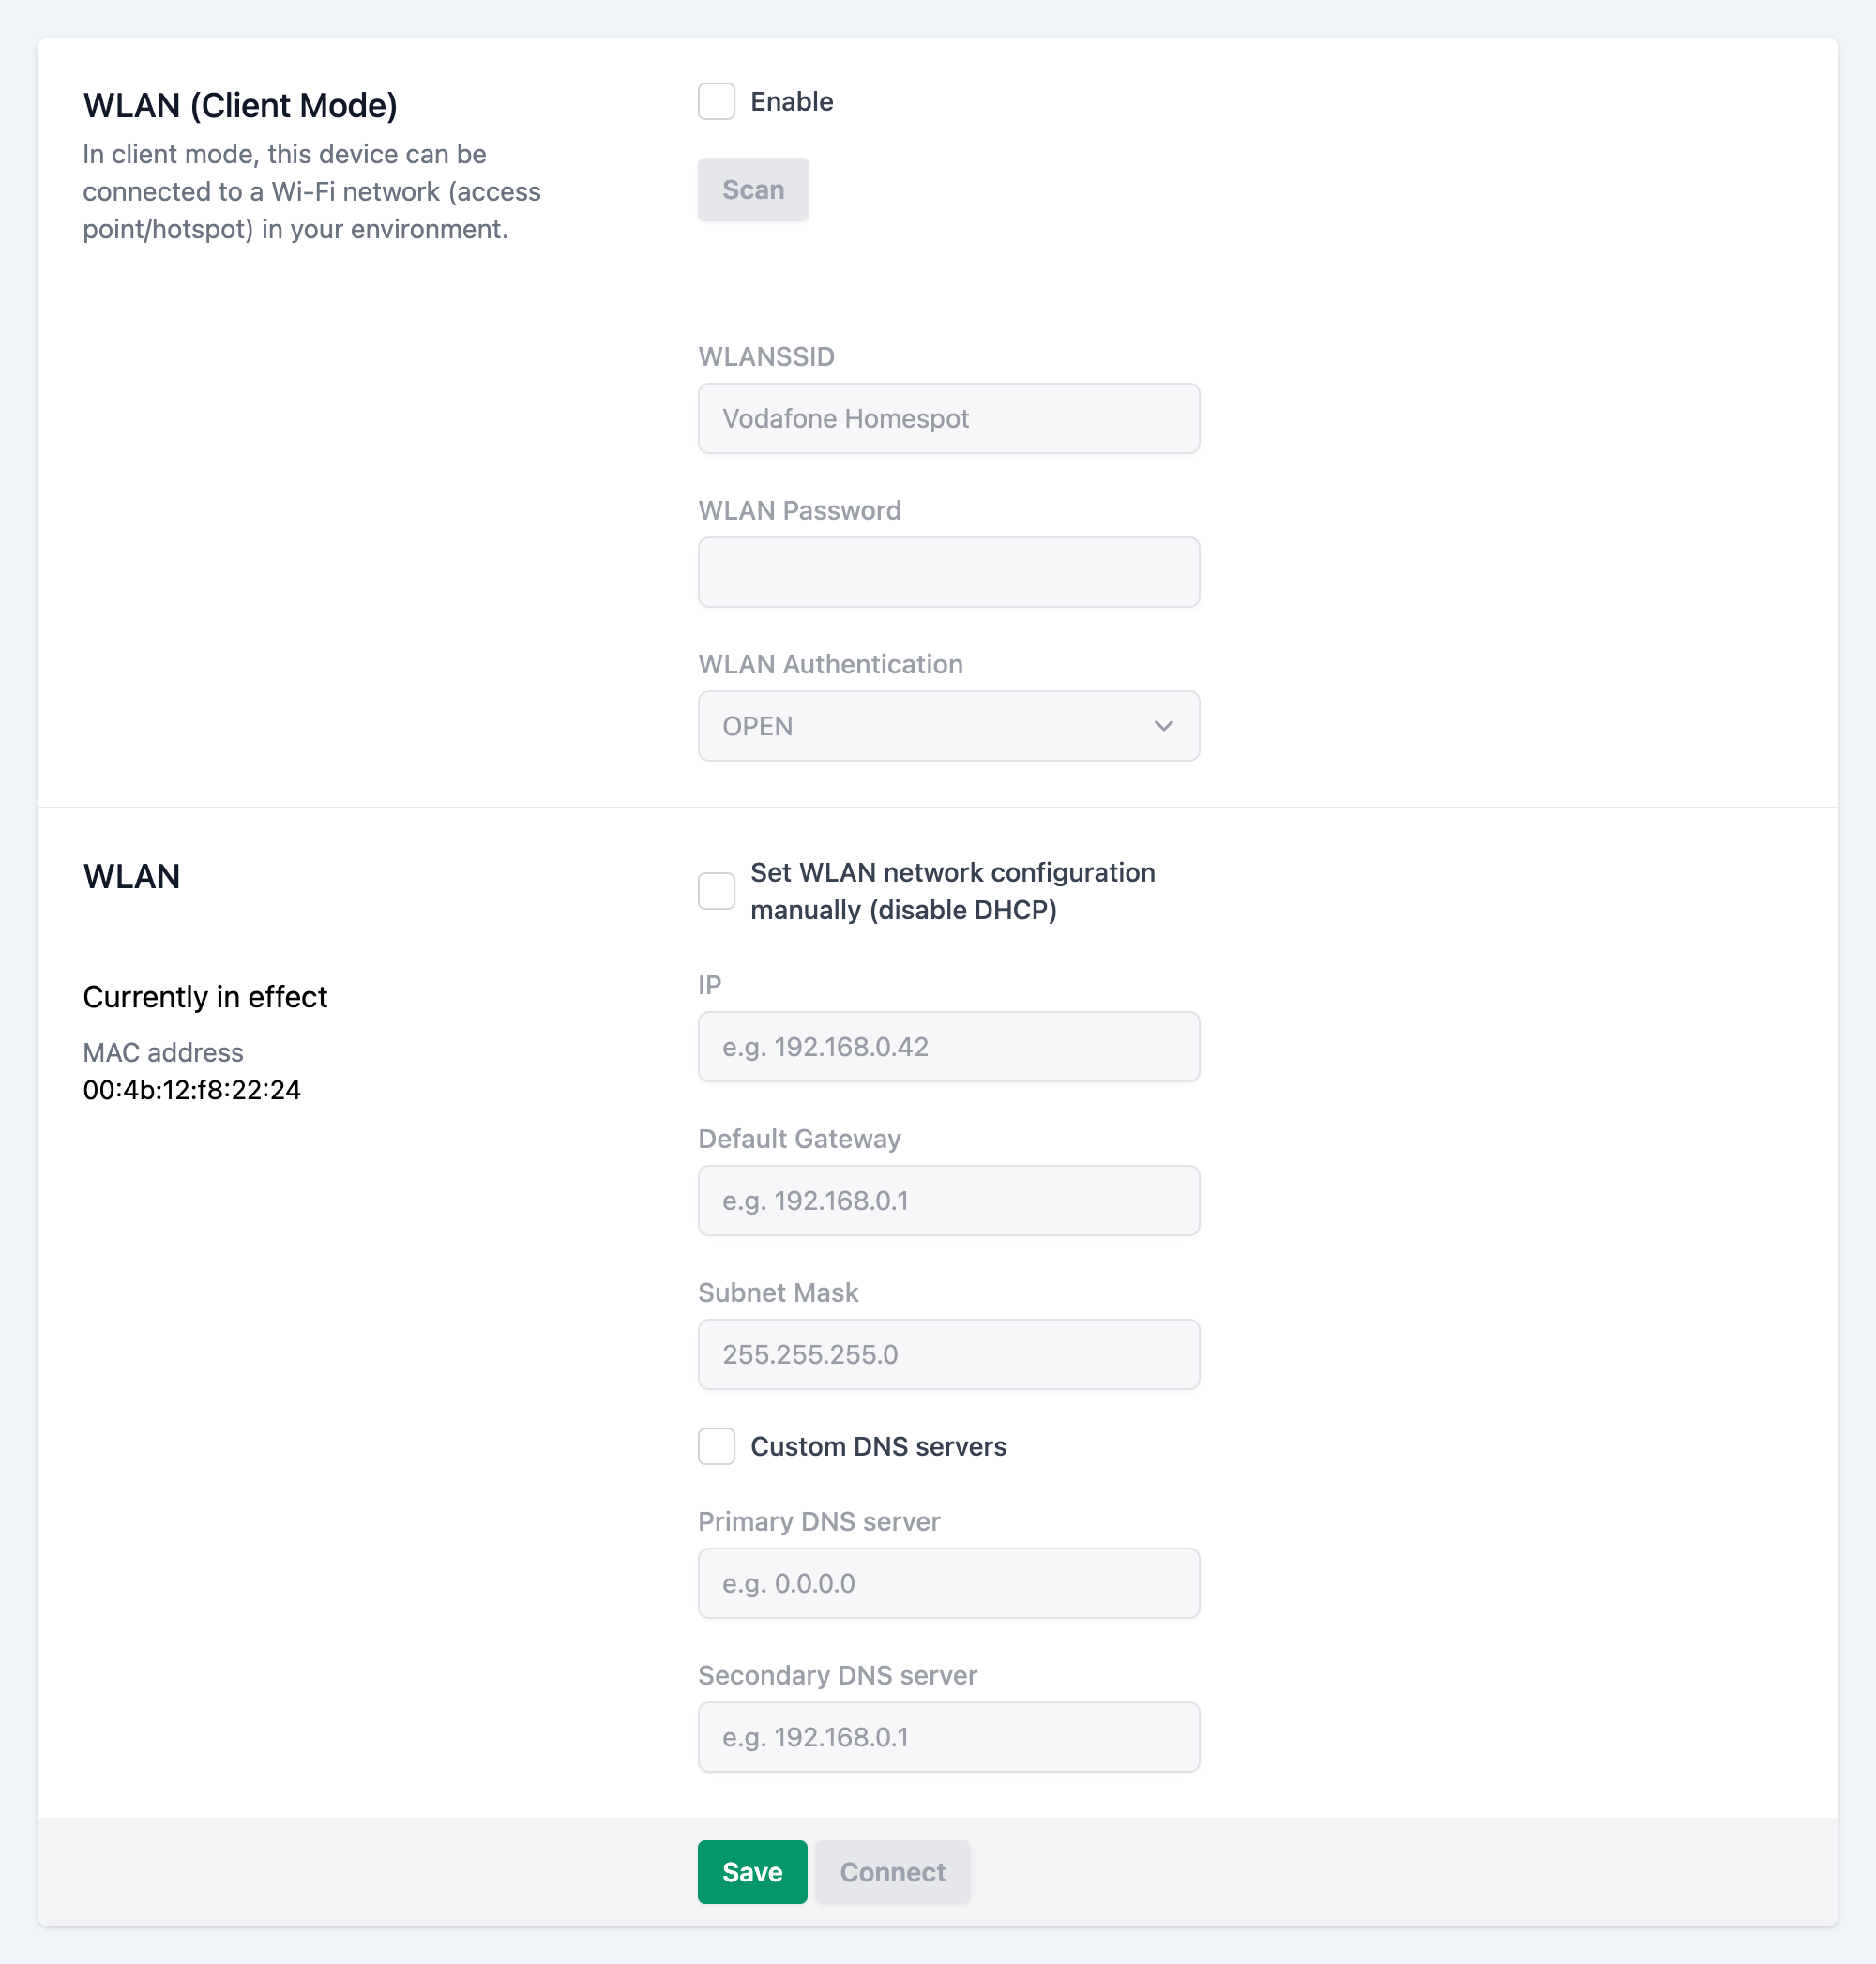
The configuration page is organized into
- Wifi connection settings (top)
- Connects the device to an existing Wifi network
- Wifi network configuration (bottom)
- Configures the TCP/IP settings for the connection
The connection settings are required to use the device as a Wifi client.
Wifi connection settings
To connect to a Wifi network
-
Tick the
Enablecheckbox. -
Click on the button.
After a few seconds, a list of found Wifi networks is shown below the button.
Select the network you want the device to connect to.
The form fields for WLAN SSID and WLAN Authentication should be populated automatically, after selecting a network from the list.
It is also possible to specify those manually.
-
Fill in the form fields
- WLAN SSID RequiredText
- The name of the Wifi network to connect to
- WLAN Password OptionalText
- The Wifi password for the network. This is only required if the encryption method in the next field is not set to
OPEN.
- WLAN Authentication RequiredText
- The encryption method for the network
- WLAN SSID
-
Click the button at the bottom of the page.
After a few seconds the page should reload and the device should be connected to the specified network.
The configuration gets saved automatically. You can verify a successful connection, by checking, that in the left column under Currently in effect, there are values present for:- IP
- Default Gateway
- Subnet Mask
- Primary DNS Server
If this did not work, please verify the information in the form fields and try again.
Wifi network configuration
Automatic configuration
By default the Wifi client interface is set to use DHCP, to automatically configure the interface. This needs a DHCP server, which is typically part of most home and business routers.
A working DHCP configuration can be checked by verifying, that in the left column under Currently in effect, there are values present for:
- IP
- Default Gateway
- Subnet Mask
- Primary DNS Server
Additionally, the MAC address of the interface is displayed in this area.
Manual configuration
In case your setup does not provide a DHCP server, or you prefer to manually configure the interface
- Tick the checkbox
Set the WLAN network configuration manually (disable DHCP) - Fill in the form fields
- IP RequiredText
- The IP address to assign to this device
- Default Gateway RequiredText
- The IP address of the network device, that connects the network to the internet. This is typically the home or business router device
- Primary DNS server OptionalText
- (optional) The IP address of the primary DNS server to use
- Secondary DNS server OptionalText
- (optional) The IP address of the secondary DNS server to use
- IP
- Click the button
Automatic configuration with custom DNS servers
In case your setup does provide a DHCP server, but you want to set the DNS servers manually
-
Leave the checkbox
Set the WLAN network configuration manually (disable DHCP)unticked. -
Tick the checkbox
Custom DNS servers. -
Fill in the form fields
- Primary DNS server RequiredText
- The IP address of the primary DNS server to use
- Secondary DNS server OptionalText
- (optional) The IP address of the secondary DNS server to use
- Primary DNS server
-
Click the button
Wifi AP
In AP (access point) mode, this device provides a Wifi network (access point/hotspot) that other devices (e.g., computers, routers) can connect to.

To activate the AP Mode
-
Tick the
Enablecheckbox. -
Fill in the form fields
- WLAN SSID RequiredText
- Choose a name for the network. This will be the name you see, when you scan for Wifi networks from your PC, for example.
- WLAN Password OptionalText
- Choose an encryption password for the network. This is only required if the encryption method in the next field is not set to
OPEN.
- WLAN Authentication RequiredText
- Choose an encryption method from the provided options in the dropdown. If you are unsure which to pick, refer to your network administrator.
- WLAN SSID
-
Click the button
-
Reboot the device, by clicking on the button, that appeared on the top of the page in a purple info box.
After rebooting, the new Wifi network should now be discoverable and ready to connect to from your other devices.
If the default option OPEN is selected as the WLAN Authentication method, the provided network will be accessible to every Wifi client device in proximity and the connection will not be encrypted or password protected!